Application timeline for Fall 2021


Untitled design (7)

If you are applying for fall 2021 the clock has begun to tick. So, don’t delay. Here is a detailed Timeline to help you start and streamline your application process:

October-December 2020 

Register for the GRE and TOEFL examinations – these examinations should preferably be taken by 15th December 2020.

October 2020

  • Make a preliminary list of universities which meet your requirements considering:
  1. Broad specializations you are interested in
  2. Expected GRE score
  3. Academic record
  4. Budget
  5. Recommendations by seniors studying in American universities

November 2020

  • Documentation
    1. Start working on your Statement of Purpose (SOP). SOP is a crucial document that provides insights into your purpose of joining the course and university, your personality, experience in the field and long-term goals. It should be around 500 to 800 words long, precise, interesting, grammatically and technically sound.
    2. Arrange for 4 sets of college and university transcripts.
    3. Choose your recommenders (preferably college professors/project guides/employers) and keep recommendation letters ready.

  November-December 2020

  • Test and application process
  1. Take the GRE and TOEFL exams latest by 20th December 2020
  2. Shortlist your final 8 to 10 universities.
  3. Complete online application process latest by 30th of December and send the required documents by courier. Of course, universities accept applications even till 31st March, so you can send them by January too in case of any delay.
  4. Request the ETS to forward your GRE and TOEFL scores to the universities you are applying to. (scores take minimum 2 weeks to come)

 After sending the applications

You will most likely receive admission decisions from Feb/March. Once you receive the decisions, email your acceptance. This is very important especially when you are offered funding.

  1. When you have accepted the university’s offer of admission and the documentation formalities are complete, the university will send you the 1-20, an immigration document, which is essential for obtaining a visa. Some universities send I-20 along with the acceptance letter.
  2. Prepare the visa documentation according to the total cost of one year mentioned on the I-20
  3. Study the visa application formalities specified on the official website of the applicable US Consulate.
  4. Apply for a visa interview date – you can apply for a visa interview 120 days before the joining date mentioned on your I-20. Generally, students start applying for a visa from the third week of April. Once you get the visa date, proceed with the interview and complete the remaining formalities until your departure date.

At Dilip Oak’s Academy, we provide detailed guidance on these processes under our admission counselling services that include, selection of universities, drafting SOP and LOR, documentation process and visa counselling. Till date, we have sent 30,000 students to various universities in America including MIT, Stanford, Cornell, Carnegie Mellon and other top-ranked universities. To enrol, call us on 91-020-67444222, 91-8007878495.



Step-by-step guide to obtain a Canadian Study Permit (Student visa)

QUICK GUIDE ON GETTING YOUR CANADIAN STUDY PERMIT (1)

In continuation with our blog published on 17/07/2020 where we briefly discussed the admission and visa requirements for Canada, we will now take you through the step-by-step process for obtaining the Canadian study permit for MS, the application timeline, and the required documents.

Before we proceed, let us first understand the difference between permit and visa. Often, students get confused between the two.

Study Permit Vs Visa

A Study Permit allows you to stay in the country until completion of your course at any of the Designated Learning Institutions (DLI) in Canada.

A Visa allows you to enter the country. You must therefore remember that the study permit is not a visa and it doesn’t let you enter Canada. For entry, you need a visitor visa or an electronic travel authorization (eTA) which is issued by the Canadian government once your application for the study permit is approved.

Timeline and documents required for Canadian Study Permit

Your application process should begin as soon as you receive acceptance letter from your desired university. The fee for a study permit is CAD 150, which is around Rs 8400.

If you are planning to go for fall intake (September), you should begin the process around June. The documents required include:

  1. Valid passport
  2. Acceptance letter from the university
  3. Proof of funds (CAD 10,000 per year without tuition for those outside Quebec. For those in Quebec, CAD 11,000 per year)
  4. Passport size photographs
  5. Immigration Medical Examination (ideally to take a week before starting the visa process)
  6. TOEFL/IELTS scores
  7. Statement of Purpose
  8. Credit card

Step-by-step application process for a study permit:

Your application process might take three to four weeks to complete hence you should start the process with some margin in your hand. Once you decide, you can either apply online or apply in-person.

To apply online, you require scanned documents and a valid credit card for payment. Before you start the application, read the instruction guide HERE. Fill out the application and pay the biometrics fee. Once you submit the application, you will receive a letter specifying the time and place to give your biometrics. From receiving the letter, you have up to 30 days to give your biometrics.

To apply in person, you can download the application kit and the instruction guide from the official website of the government of Canada,  fill the VFS consent form and attach it to the application, pay the processing fee (in addition to VFS Global services charges), and submit the documents at the nearest VFS office.

While you can go with either of the ways, we recommend students to apply online as the process is faster and easier.

Once your application is approved, you will receive a letter of introduction. This letter is not your study permit. You need to show it to an officer when you arrive in Canada. Along with the letter, you will also be issued an Electronic Travel Authorization (eTA) or a visitor visa (temporary resident visa) to enter Canada.

On arriving in Canada, you are required to present all these documents to the border services officer, who after validation, will issue you with the study permit.

Great FREE Application Tools on DOA Online: Part 3 – Question & Answer Forum

Question & Answer Forum

Question & Answer Forum

– What are transcripts?
– When should I register for the GRE test?
– Where can I find university deadlines?
– From whom do I need to take recommendation letters?

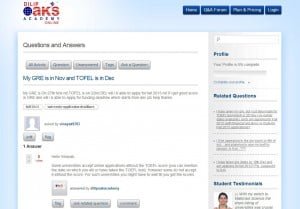
The list of questions that come up when you are applying to American universities is endless. Most probably you won’t know where to look for solutions or, whom to ask for the answers. That’s where the next of our great free application tools comes in – the DOA ONLINE Q&A FORUM.


On the Q&A Forum (click screenshot below for enlarged view) you can:

  • ask any questions you have regarding the application process for American universities
  • get answers and expert advice from the academy (look for answers by the admin!)
  • get valuable tips and insights from other registered users – since they have gone through the same situations and problems, their advice is often the best: no one understands your situation better than those traveling on the same path!
  • consult the vast database of questions and answers already on the Q&A forum.

Continue reading

Recommendation Letters – Part 2: Ingredients of a Good Recommendation Letter

What Recommendation Letters should Cover

Recommendation letters should cover the following points (also see the links to great sample recos at the end of this post):

  • How long the recommender has known you and in what capacity (teacher, seminar or project guide, practical supervisor, project leader etc.)
  • His or her assessment of your academic performance (relative rank etc.), intellectual abilities, work habits and character
  • Your special achievements – especially in projects or in papers presented
  • Your communication skills – how well you were able to present your seminars
  • Your social skills – ability to work well with others, leadership qualities
  • Some background about the recommender – this is useful in the case of professors whose work in a field might be good but little known outside India; things to highlight include area of work, achievements in that area (papers published, awards etc.), prominent places worked in, length of experience and so on

The University Transcript: A Comprehensive Description of the Details Included

Your transcript should contain the following:

  • a ‘bona fide certificate’ containing:
    • your name
    • the name of the college where you studied
    • the name of the course you studied
    • the duration for which you were at the university/college and date of completion of the course
  • the examination scheme which, includes details such as:
    • whether all subjects are compulsory or whether there are elective subjects, a project etc.
    • the number of semesters in the course and the duration of each semester
    • the duration of each lecture
    • the minimum marks required to pass in a subject
    • the maximum number of grace marks that may be given so that a student may pass or obtain a higher class
    • the score scheme used: grade point average (GPA) or aggregate percentage/class system
  • the ‘mark sheet’ section which, states:
    • the breakup of subjects studied in each semester
    • the number of hours per week for lectures and practical work in each subject
    • the maximum marks per subject
    • the marks you obtained in each subject
    • your total marks, percentage (or relative grade), class and relative rank in the class, college or university in each year
  • the highlights and history of your college or university (in brief)

Related Links

All About The Resume – Part 1: Why You Must Send a Resume in Your Application Packet


Why Sending a Resume Matters

Resumes (pronounced re-syoo-mayz) are included in your application for an American university for three reasons:

  • firstly, to give the admissions committee a brief snapshot of your academic performance – academic performance carries great weightage in deciding whether you will be admitted or not and in some universities admissions committees form their first impressions of your academic performance by looking at your resume
  • secondly, to present your qualifications for a research or teaching assistantship – for this reason remember to attach a covering letter to your resume requesting that it be circulated to interested professors
  • thirdly, to provide details of projects, seminars, industrial training etc. that you could not include in your SOP because of the word limit

All About the Resume – Part 2: Make It Easy for Professors Select You

Why the Resume is Different from a Bio Data or a CV – and Why It Should Stay that Way

Note that the resume is different from a bio data or a curriculum vitae (CV) in several respects: whereas bio datas and CVs are all-inclusive, data bank-like documents written in chronological order, resumes are compact, focused documents written in reverse chronological order that highlight only the most relevant and important information for course (or post) being applied for. So, don’t turn your resume into a Bio Data or CV – that would defeat the very purpose of the document.

Your resume should contain only the relevant information because professors are busy people who are hard pressed for time: if you bury the information they need in a sea of irrelevancies they might lose interest – and you might lose a position they might otherwise have awarded you. In other words, don’t hide the information that tells them that you are the candidate that they are looking for: make sure that when they see your resume they can’t miss it.

Continue reading

All About the Resume – Part 3: How to Create a Snapshot of Yourself in One Brief Page

Tips for Writing Resumes

A resume, like all other application documents, is designed to answer one crucial question: “Why should you be selected?” Of all the application documents (the SOP, the recommendation letters, and the transcripts), the resume answers that question in the briefest yet most comprehensive way. In order to achieve its goals, the resume must present the most important facts about you in their most concentrated form, in the smallest possible space. This will enable it to present a compelling snapshot of your strengths as a candidate and persuade the Admissions Committee that you are a good choice. Here are some tips that will help your resume to achieve its intended goals:

Continue reading

How to Apply for an ‘MS in US’: Find the Key Steps Here

Application Process ImageOnce your final list of universities is ready, you can start applying to universities for your much dreamed of ‘MS in US’. Here are the key steps:

  • Complete the online application forms
  • Request ETS to send your GRE and TOEFL scores to the university/department
  • Prepare document packets, consisting of:

It is really important that you carefully follow all instructions regarding the sending of documents. Please also adhere to prescribed deadlines since the application can be rejected if you are late.

Remember you can always call up the Academy if you feel you can’t carry out this demanding process all alone. We have services that are designed to take care of every difficulty you face – we are always there to help.

All the best as you move on to a great admit!

Related LInks